In this DIY guide you will learn how to fit a roller blind to a wall to cover over a window reveal. You will also learn about the different types of fitting including face fitting and inside fitting and also the best way to cut a roller blind down to size.
Installing a roller blind over a window reveal is a quick and easy way to add a window covering in your kitchen, bathroom, bedroom or other room.
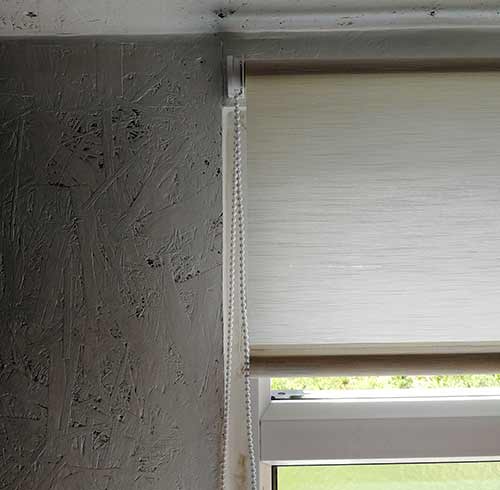
When fully extended, a properly sized roller blind will completely cover the window reveal. Unlike curtains, when rolled up, the blind won’t overhang the edges, providing a clean and open look.
Roller blinds are affordable and require only basic tools for installation, such as a drill/driver and masonry bits.
Read on to learn how to easily fit a roller blind over a window reveal.
Roller blind unrolled covering window reveal
Yes, many roller blinds can be cut down to fit your specific size of window reveal.
Most manufacturers suggest using a junior hacksaw. Measure and mark where you want to cut, then use the hacksaw to cut through the blind material and inner core.
However, this method often leaves jagged and frayed edges.
For a cleaner cut, fully unroll the blind and use a hobby knife and straight edge or sharp upholsterer’s scissors to trim the fabric. Cut the roller core (usually cardboard or plastic) with a junior hacksaw for a neat finish.
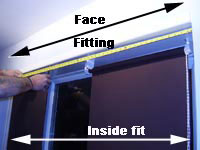
There are two ways to install window coverings: inside the window reveal (inside fit) or over the window (face fitting).
The choice is yours:
Inside Fitting: This option is neater as the blind tucks inside the window reveal. However, it can be tricky due to limited access and often requires drilling into a lintel, which can be challenging.
It can also be tricky cutting and fitting etc blind so that it fills the entire reveal width as if you have gaps around the outside, light can still get in (if you are aiming for a blackout effect).
Roller blind fitted inside window reveal
Face Fitting: This method is easier as it offers more space and often avoids lintels. However, it can appear less tidy.
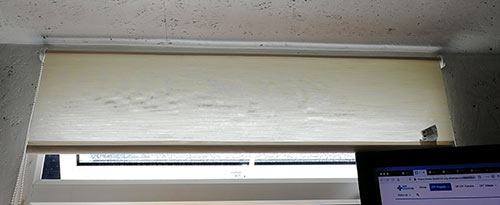
It also allows you to cover over the entire reveal, preventing any light leaks around the edges if you are aiming for a full blackout effect.
Roller blind face-fitted to window reveal
First, measure your window opening. If the roller blind will hang over the entire opening, allow for a suitable overhang on each side of the window reveals.
For wall face fitting, add 50mm on each side of the opening and ensure the distance is equal on both sides.
For inside fitting, leave a 25mm gap on each side between the blind edge and the window reveal.
In this example, we are face-fixing a roller blind over a garden office window.
Your blind will have two different brackets: one for the pull cord or chain side and one fixed bracket for rotation.
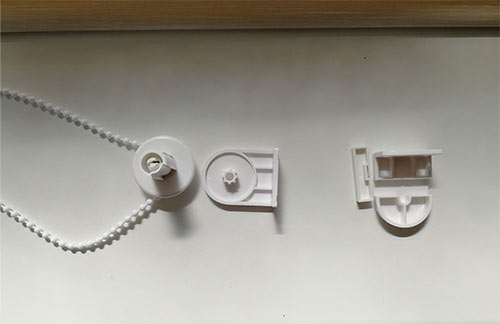
Brackets and mechanisms may vary by type and manufacturer. For reference, the following image shows the brackets used in our example.
Roller blind brackets and pull cord
Before installing, do a test fit to understand how your roller blind assembles and operates.
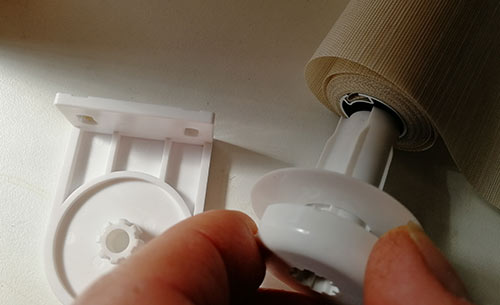
In our example, the pull cord mechanism has a recess that slots into a locator on the roller, allowing it to turn when the cord is pulled.
Recess in roller blind pull cord
This shows where the pull cord insert fits into the roller body.
The pull cord bracket has a spline that fits into the pull cord, securing it and allowing the roller to turn when the chain is pulled.
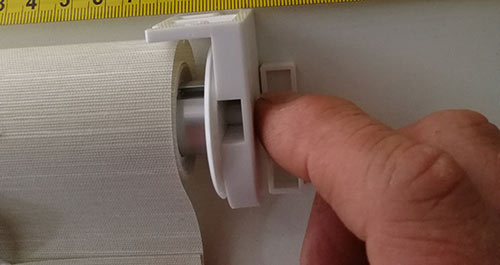
The idle bracket on the other end houses the pin on the roller body, allowing it to rotate freely. It also has a clip to hold the pin in place once the roller is installed.
Idle bracket clip to hold roller in bracket
To ensure your blind is centred and covers the window fully, measure and mark the exact position for the brackets before fixing them.
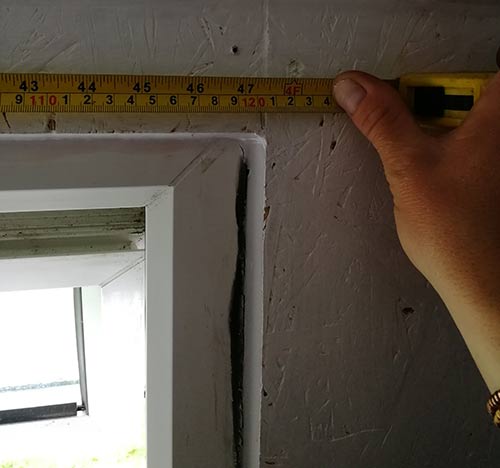
For our 1200mm blind over a 1200mm UPVC window, the frame added 50mm on each side, giving enough overhang to cover the glass. The window reveal was 1210mm wide, and the blind, including brackets, was 1200mm, so the brackets were positioned 5mm inside the reveal.
Measuring size of window reveal
Starting with the left bracket, measure and mark a point 5mm from the reveal edge. Position the bracket, level it, and mark through each fixing hole.
We fixed into a timber surface, screwing directly into it. For masonry surfaces, drill a 6mm hole, insert a red wall plug, and then fix the bracket (more information on fixing to masonry surfaces).
Drill a small pilot hole to assist with inserting screws. Tips on drilling pilot holes can be found in our project guide.
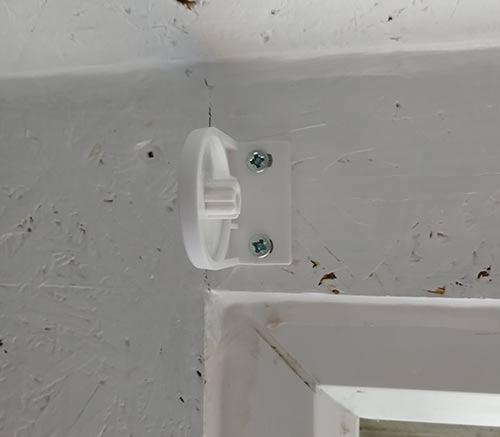
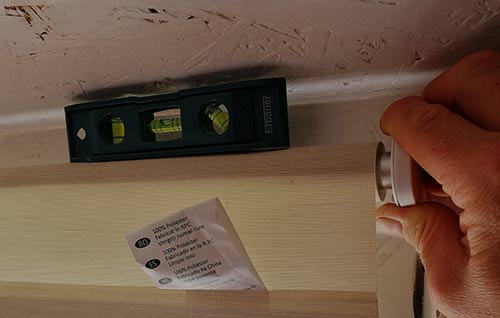
Once the pilot holes are drilled, screw the first bracket in place, using a spirit level to ensure it is horizontally square.
First roller blind bracket screwed in place
After securing the first bracket, insert the roller blind with the chain mechanism attached. Position the right-hand bracket onto the roller’s pin and raise the blind into place above the window.
Use a spirit level to ensure the blind is level and mark the fixing holes for the second bracket with a pencil.
Remove the roller and bracket, setting them aside.
Leveling and marking the second roller blind bracket
Drill small pilot holes for the screws, just as you did for the first bracket.
Secure the second bracket with screws, ensuring it is perfectly square.
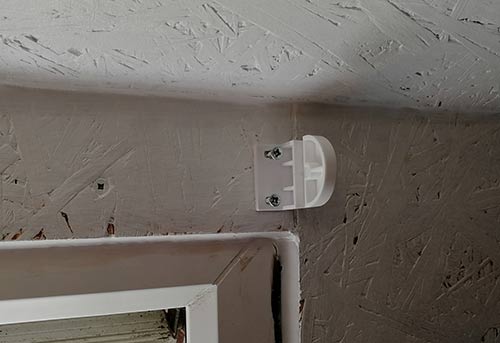
Proper alignment of both brackets is crucial to prevent the roller blind mechanism from binding and operating smoothly.
Second roller blind bracket or idle bracket screwed in place
With both brackets securely fixed, it’s time to install the roller blind and chain mechanism.
Insert the chain’s splines into the bracket carrier, ensuring the chain hangs correctly at the base for proper roller action.
Once engaged, slide the splines into the bracket, then insert the pin into the right-hand bracket, making sure it’s fully seated in the housing.
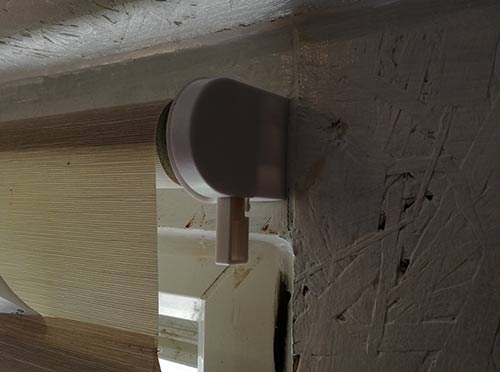
Secure the pin with the retainer clip to prevent the roller from dislodging.
Inserting pin to hold roller in place inside bracket
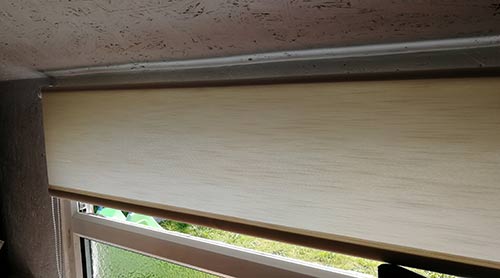
Test the roller blind to ensure it operates smoothly. You’re done!
Roller blind successfully fitted over window reveal
Fitting a roller blind over a window reveal is straightforward. Take your time, ensure everything is square and level, and you’ll succeed with a top-notch job!
All project content written and produced by Mike Edwards , founder of DIY Doctor and industry expert in building technology.